Concept Maps
Introduction
Concept maps are visual tools that organize and present information in a clear, structured way. For faculty, they offer a practical method for breaking down complex topics into manageable parts, helping students see how ideas fit together.
In online courses, where students mostly work independently, concept maps can guide learning by making course content more transparent and easier to navigate. They can also support students in organizing their own understanding of the material.
A Closer Look
Approaches to Creating Your Concept Map
There are different ways to structure a concept map depending on your purpose. You might design a map to reflect how your course is organized, or you might focus on helping students understand a single topic in depth. The following approaches illustrate these options and can be adapted to fit your course design and instructional goals.
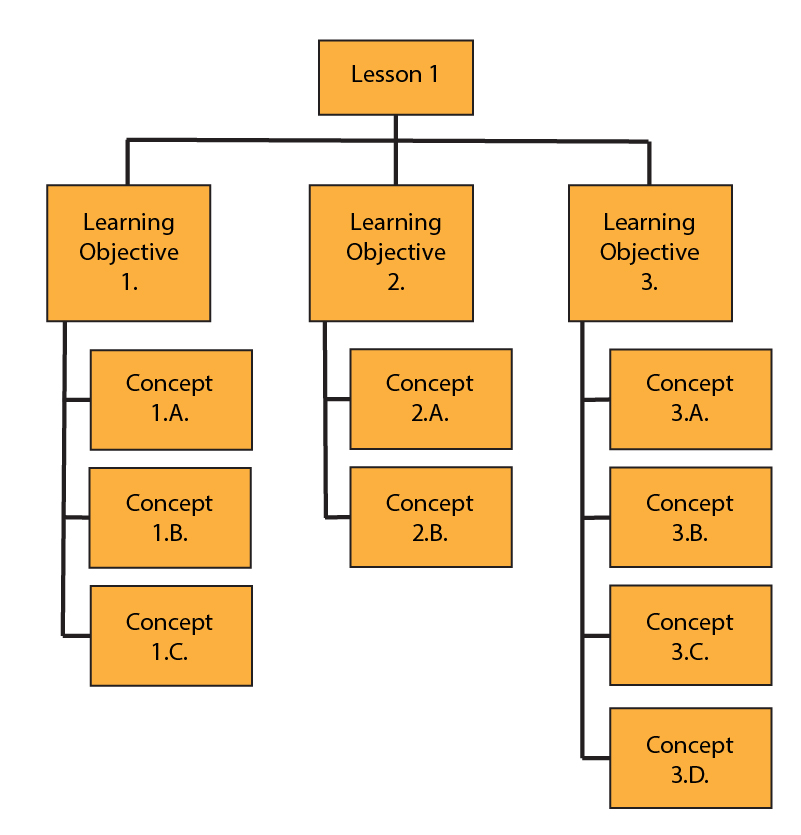
Based on Course Structure
In this approach, the concept map mirrors how your course is organized. For example, you might create a map for each lesson by listing its learning objectives and the key concepts within them. This helps students see how content is grouped and how ideas progress over time.
This type of map is especially useful in semester-based courses, where the goal is to clarify the sequence of material. The emphasis is on organization rather than showing detailed relationships between concepts.
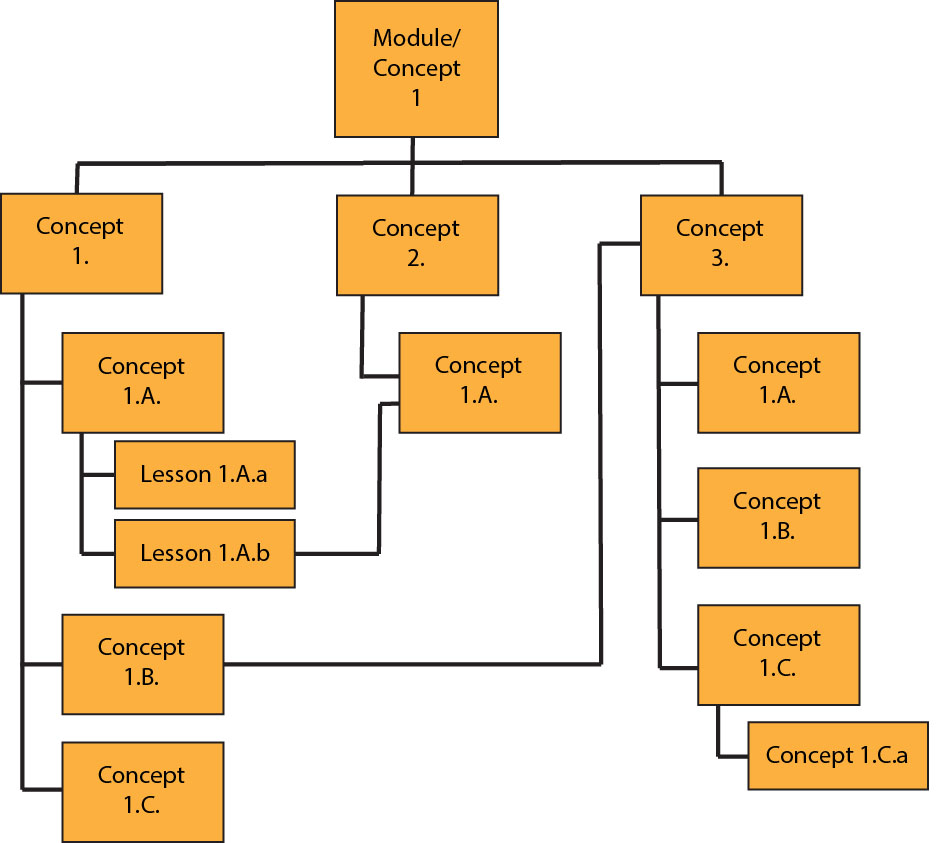
Based on a Single Module or Concept
In this approach, you begin with a single module, lesson, or key concept and build outward. The concept map focuses on the topic itself—what it includes, what supports it, and how it can be understood.
This approach is useful when the goal is to deepen understanding of a specific topic. For example, you might use it to map out the parts of a research paper, explain a key theory, show the steps in a lab procedure, or support exam review on a particular concept.

Concept maps can also be used as learning activities for students:
- Ask students to create a concept map for a lesson or module to demonstrate their understanding of the content.
- Have students share their maps in a discussion forum and give feedback to their peers.
- Provide your own concept map as a reference and ask students to compare it with theirs as a form of self-assessment.
Additional Resources
- Concept Mapping from the Stanford Center for Teaching and Learning
- Concept Mapping and Curriculum Design from the University of Tennessee Chattanooga
- Concept Maps from Kent State University Center for Teaching and Learning
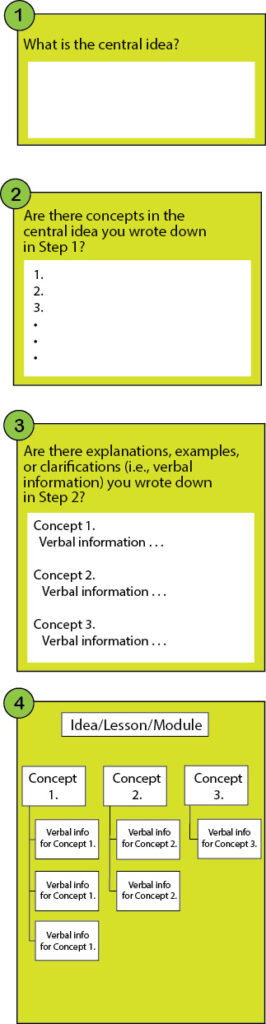
Process for Building a Concept Map